Web Hosting and Domain Names
How to Find and Install a WordPress Theme
Yesterday you installed your WordPress blog on your domain. Today you’ll discover how to quickly and easily change the design of your blog.
Blog Design
We don’t need to go into too much depth about designing your blog. What you really need to know is to make it consistent with your brand and optimize for results.
The reason we don’t focus on blog design is because WordPress and WordPress themes make it really easy to make a great looking authority blog.
You can start out with a free theme and move to a paid theme as you go. You don’t need to know anything about HTML or web design in order to change the blog’s design. That’s because there are thousands of free and paid (premium) “themes” (designs) available for your WordPress blog.
I recommend that you don't even change your theme until you have ten posts.
Spend 5 minutes or less deciding, because you don't want to spend all day beautifying your site, if not going to make much money.
Most themes look good. Just don't pick an ugly one. At this point, your focus should be on creating content.
Keep in mind that you can get a high-quality theme anywhere from $50 to $100 later.
Tip: If you have a unique theme in mind – or if you want something totally exclusive – then you can hire a WordPress theme designer. Just go to upwork.com and post your request for a theme designer.
Generally, this isn’t necessary, however, since there are thousands of themes to choose from. You’re certain to find something that you like.
However, you can start with a theme and then have a designer “tweak” it to make it more exclusive or to better suit your purposes.
For example, you can have a designer create a new graphical header that better matches your blog’s name and content.
Here are three ways to find a theme:
- Go to https://wordpress.org/themes
- Use Google to search for “WordPress themes” or “WordPress templates.”
- Visit popular theme sites like ThemeForest.
In all cases, a simple search for WordPress themes will uncover thousands upon thousands of results. That’s why you’ll want to narrow down the results by searching for specific kinds of themes.
For starters, you can search for niche-specific themes, such as “weight loss themes” or “dog themes.” You can further narrow the results by searching for the colors or styles you like, such as:
- Columns: “two column” or “three column” themes.
- Colors: “black and white theme” or “blue theme” or your favorite colors.
- Style: “art themes” or “professional theme” or “simple theme.”
You can easily upload, preview and install it right from your dashboard.
If you are using a free theme from WordPress.org, go to your left-hand dashboard menu and click on Appearance>>Themes>>Add new. When the “Add Themes” window opens up, enter the name of your WordPress.org theme in the search bar.
If you don’t yet know the name of the theme you want, simply enter a parameter you want it to match, such as “3-column responsive”—always choose a responsive theme.
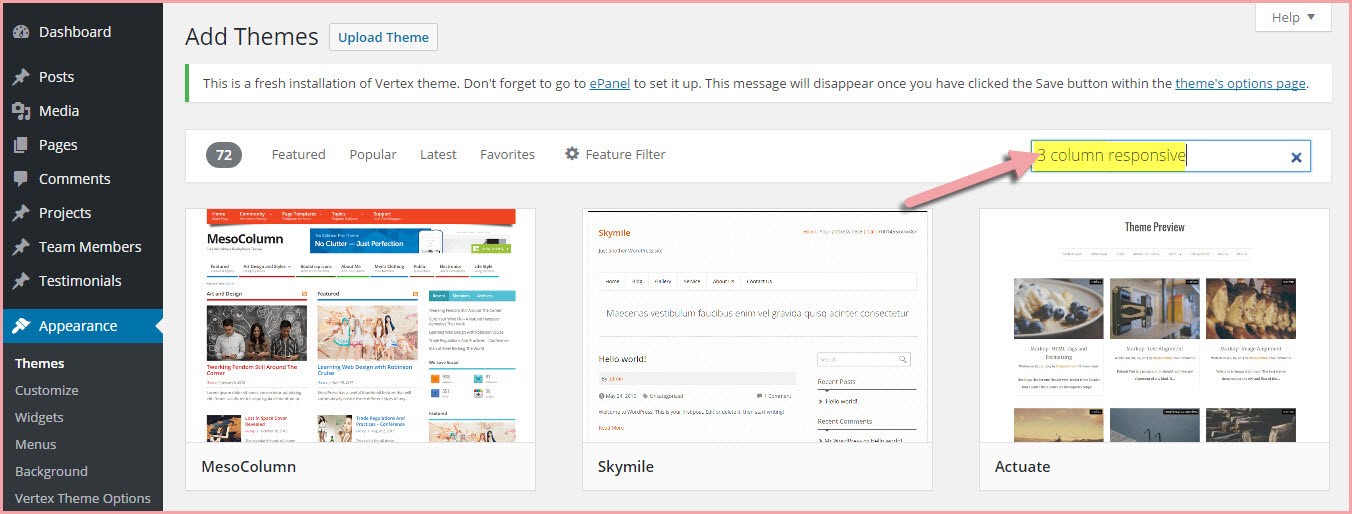
You will instantly see a selection of themes fitting those parameters that you can choose from. You will be given the option to Preview them before deciding to install.
If you have purchased or have downloaded a theme to your computer.
IMPORTANT: Keep your downloaded theme zipped.
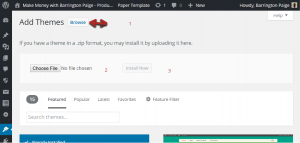
To find and upload your new/premium theme from your computer to your website:
- Go to Appearance>>Themes, and click on the “Add New” button.
- Select “Upload Themes”.
- Press the “Choose File” button and select your theme (still zipped)
- Click the “Install” button
Once you are notified the install has been successful, you can select your new theme from Themes.
You should now see the theme you just uploaded. Click on it to show a preview, then click on the “activate” link. Your new theme is now installed!
Today’s task: Find and install a theme. More customization tips coming tomorrow!
How To Install Your WordPress Website
Day 7 - Install Your WordPress Website
Last time you set up your domain name and hosting. Now it’s time to set up your blog. If you’ve done any research on blogs before, you probably already know there are a lot of choices.
So let’s go through some of your options to find out which one is the best…
- Self-Hosted or a Third-Party Blog?
Since I’ve already asked you to buy a domain name and hosting, it’s pretty clear that you’re going to set up a “self-hosted” blog.
Nonetheless, let me share with you why this is important…
You’ve no doubt seen some of the third-party blog solutions. One of the most popular is Google’s Blogger.com. There are also other solutions like LiveJournal.com, WordPress.com and a whole host of others.
All you have to do is register an account on these sites, choose a blog name… and you can be blogging in a matter of minutes. Most of these platforms are very user-friendly, meaning you don’t need to know a lick about scripts or other technical stuff in order to be up and blogging fast.
So why not use a third-party solution? Here’s why:
- No commercial content. Some of these sites flat-out prohibit commercial content. And since you’re going to turn your blog into a money-maker, a non-commercial blog isn’t an option for you.
- The site could disappear tomorrow. When you entrust your content – even your income – to a third party, you’re rolling the dice. The company could go bankrupt. They could sell to another company who changes the rules. Point is, your blog could disappear in an instant.
For example, Google deletes artist’s blog and a decade of his work along with it.
- You have no control over your content. Some third-party blog solutions paste their ads on your site. Some have very strict rules about what you can and cannot write about or what you can link to (which goes back to the commercial content issue again). And all of these sites can just arbitrarily pull your content or change the rules… and there’s nothing you can do about it.
Obviously, a self-hosted solution is best to retain control over your content. But which blog platform should you choose? There are plenty of platforms – just search Google to see what I mean.
For the purpose of this lesson, we will be teaching you how to install WordPress as your website/content management system.
Why WordPress?
- It's free!
- Easy to use
- Manage your website anywhere that has an internet connection
- No HTML or CSS coding skills required
- Themes for designing your website
- Completely customizable
- A lot of users = great support
- Unlimited functionality available with plug-ins
- Search engines like WordPress
Once you have set up your web hosting account, got your “Welcome” email and pointed your name servers to your new web host’s server, you are ready to install your WordPress website! (It may take as much as a day for the change to take place.)
The WordPress platform makes installation easy!
No matter who you have chosen for your web host, go to your cPanel dashboard (look in your “Welcome” email for instructions on how to log into cPanel) and scroll down through all the various options until you come to the section “SOFTACULOUS APPS INSTALLER”.
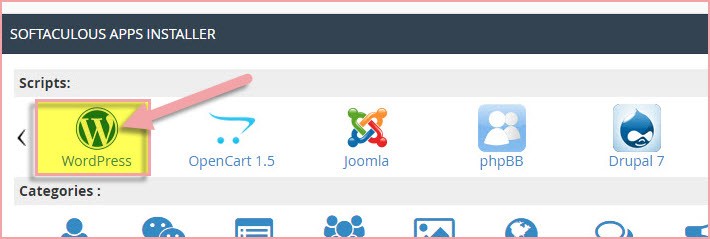
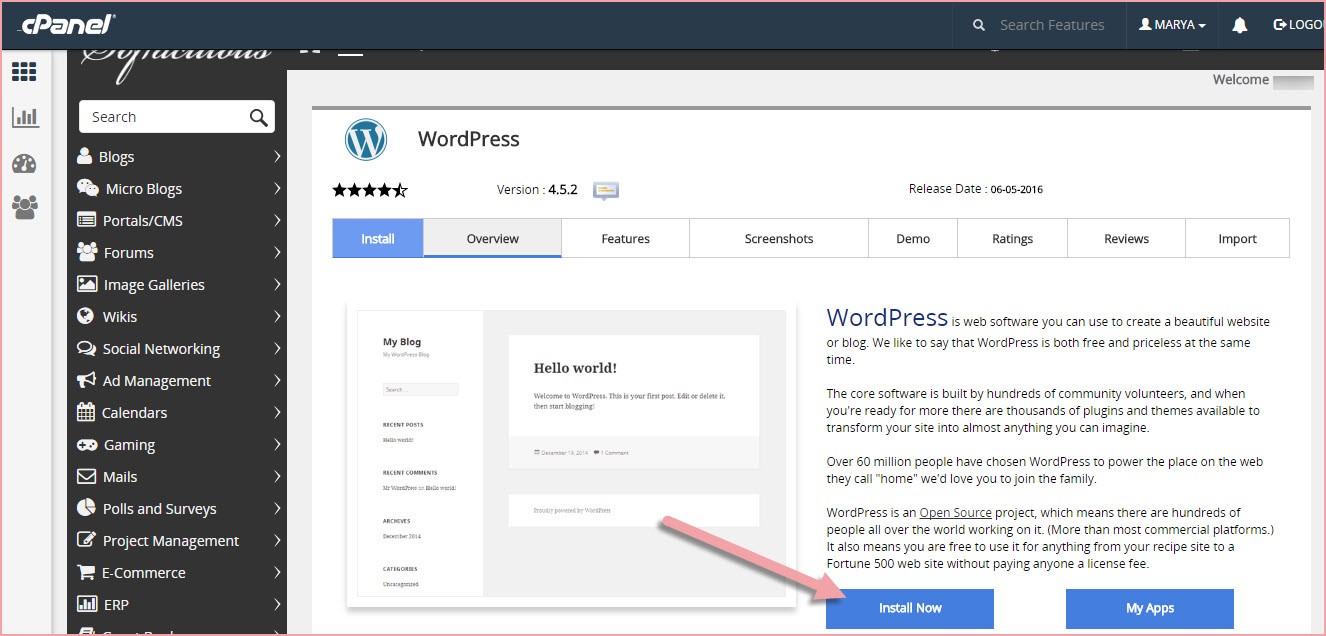
Click on the WordPress symbol, and it will take you to the next page. Scroll down if you have to, and when you find the button, click on “Install Now”.
You will then need to fill in information for your site in the following categories before proceeding to the next step:
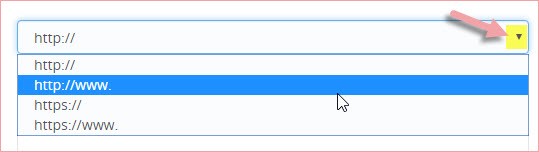
- Protocol: Leave this blank if you want your URL to start with just “http://”—or if you have an SSL certificate for a “https://” sit—or you want “www”, press the drop-down arrow and select the protocol you prefer.
- Choose Domain: There should only be one domain showing—your new one—if this is a brand new web-hosting account. As long as the domain name is showing, you don’t have to do anything.
Tip: One of the first pieces of info you’ll get asked for is where you’d like to install WP – specifically, which directory on your domain.
You’ll want to install it on your “root” directory so that anyone who goes to www.yourdomain.com immediately sees your blog. As such, leave “Install on Directory” blank so that your blog is in your main/root directory.
- Site Settings: Replace the generic text with your site/blog name (e.g. “Web Profit School, Basketball Coach”); and a brief description of what it’s about.
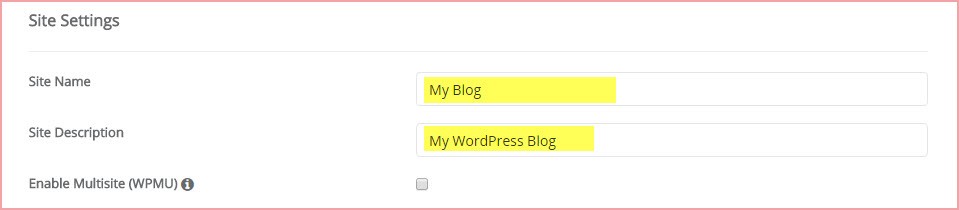
(Do not check “Enable Multisite (WMPU)
- Admin Settings: Resist the urge to allow your admin name to be “Admin”—that is far too easy to hack! Choose something random, like “BlwDl2” as your admin name. (Randomize your password too.)
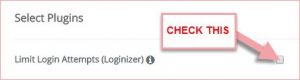
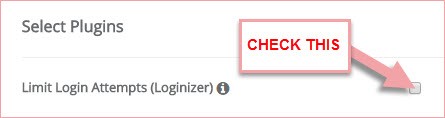
- Select Plugins: Enable the Limited Login Attempts plugin by checking the radio button. (We’ll be adding more plugins later).
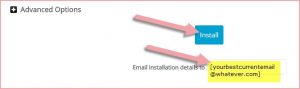
- Advanced Settings: All you need to do here is enter the email address that you want WordPress to send your installation details to—and press “Install”.
Once you’ve pressed “Install”, that’s it! You can log out, and collect your installation details from your email inbox at the address you just entered.You’ll now be taken to a screen which tells you how to log into your new blog. The link should look something like this:
http://yourdomain.com/wp-login.php .Be sure to write this information down, along with your username and password so that you don’t forget or lose them.
Next, go to your domain name (www.yourdomain.com) to see if the installation was successful. If you see any error messages, delete the blog and try again. Otherwise, if all looks good, then log into your WP dashboard.
Today’s task: Log into your WP dashboard and familiarize yourself with all the links and functions.Tomorrow you’ll start learning about how to customize the form and function of your blog!

Recent Comments